How To Make An Unattend.xml Sysprep File
Sysprep is very useful in preparing an image for cloning / imaging by stripping all specialization from the installation like: drives, SID, PNP enumeration, name and more. During the next reboot PNP is initiated and the Out Of Box Experience is run; this is similar to a preloaded laptop or computer from the factory starting up for the first time.
When you are cloning/imaging machines in mass it is extremely handy to automate as much as possible. Using the Windows AIK (Automated Installation Kit) specifically a tool called Windows SIM (System Image Manager) you can automate the entire process. The unattend.xml file is used along with sysprep to automate the image specialization and OOBE after it is cloned and rebooted.
The following process will automate the sysprep so next reboot it will only ask for computer name. Some assumptions during this article are: you are creating an English/US install, you are using a KMS server and your timezone is EDT.
Step 1. – Download and install the latest WAIK from http://downloads.microsoft.com, the WAIK should support Windows 7 and 2008 R2 (check the date).
Step 2. – Get your media that you have installed with and mount it in the DVD-ROM or via and ISO mounting utility; if it is only and ISO. You will need to allow Windows SIM to access the install.wim in the next step.
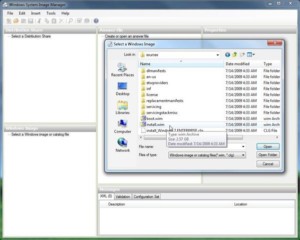
Step 3. – Start Windows SIM and right click on “Select a Windows Image or Catalog” and find the “install.wim” in the sources directory on the media. In this tutorial I used x64 (amd64) media, this also works for x86 media; using the same steps.
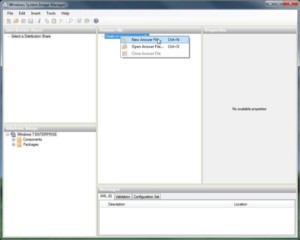
Step 4. – Now we need an answer file, so right click on “Create or open an answer file” and select “New Answer File”
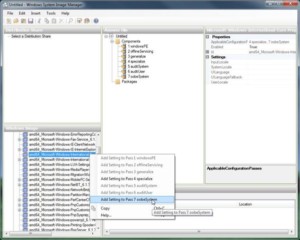
Step 5. – On the left hand side open the “Components” folder and find “Microsoft-Windows-International-Core”, right click and select “Add Settings to Pass 7 oobeSystem”. It will be added to the answer file in the center.
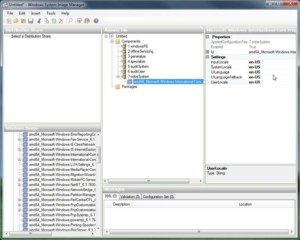
Step 6. – Fill in the settings for InputLocale thru UserLocale in the properties pane; I used en-US for English language and United States locale. The “en-US” is defined in the RFC4646 actually two standards put together: the ISO 639-1 code for known languages and the ISO 3166-1 code for assigned country codes. Microsoft has an article of supported RFC4646 locales called the LCID reference http://msdn.microsoft.com/en-us/library/cc233965%28v=PROT.10%29.aspx
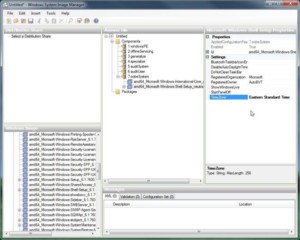
Step 7. – On the left hand side under the “Components” folder and find “Microsoft-Windows-Shell-Setup_6.1.xxxxx”, right click and select “Add Settings to Pass 7 oobeSystem”. It will be added to the answer file in the center. Click on the Shell-Setup in the answer file section and fill in the TimeZone under properties. A list of these time zones can be found here http://technet.microsoft.com/en-us/library/cc749073%28WS.10%29.aspx.
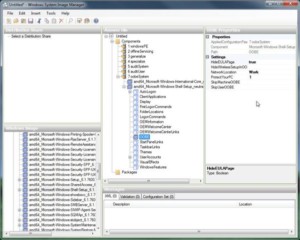
Step 8. – Open the “Microsoft-Windows-Shell-Setup” folder in the answer file and find OOBE and click on it. In the properties page set “HideEULAPage” to true and Network Location to Work, Public or Home. The “ProtectYourPC” property can be set to: 1 for recommended protection, 2 for updates only and 3 for automatic protection to be disabled. These all related to the Windows Update protection. http://technet.microsoft.com/en-us/library/cc749278%28WS.10%29.aspx
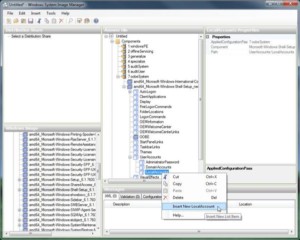
Step 9. – We need to setup the first administrator account since Windows 7’s administrator account is disabled by default. Further down under “Microsoft-Windows-Shell-Setup” click on “UserAccounts” then right click on “LocalAccounts” and select “Insert New LocalAccount”.
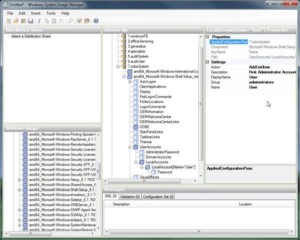
Step 10. – In the properties of the local account on the right side; fill out Description, DisplayName and Name. The Group must be “administrators”, so that you can locally administrate the computer (i.e. login local).
Step 11. – Click on “Password” under the “LocalAccount[Name=”username”] and in the properties pane set the password for the account. The password will be saved in the XML file however it will be encrypted (the encryption used is unspecified in Microsoft’s documentation).
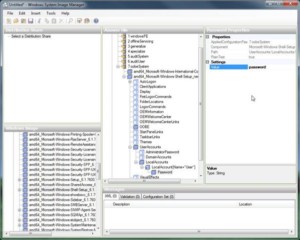
Step 12. – On the left hand side under the “Components” folder and find “Microsoft-Windows-Shell-Setup_6.1.xxxxx”, right click and select “Add Settings to Pass 4 specialize”. It will be added to the answer file in the center; respectively under “4 Specialize”. Click on the Shell-Setup in the answer file section and fill in the “ProductKey” with the default KMS key found here http://technet.microsoft.com/en-us/library/ff793406.aspx. These product keys will not activate via Microsoft (retail), instead they are dummy keys for a Key Management Server to activate. The product key I used was for Windows 7 Enterprise “33PXH-7Y6KF-2VJC9-XBBR8-HVTHH”. Setting this will skip the activation question during setup, but make sure you have a KMS server running. Also make sure you have met the 25 client threshold or the KMS will not activate any of the clients. http://technet.microsoft.com/en-us/library/ff793434.aspx
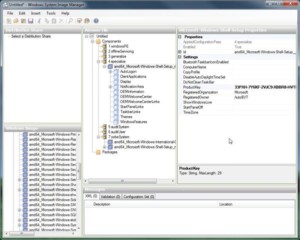
Step 13. – Right click on the answer file and choose “Close Answer File” when prompted save it as “unattend.xml”.
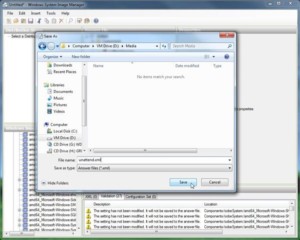
Step 14. – Copy the unattend.xml into “C:\windows\system32\sysprep” folder and create a startprep.cmd file containing the code below. The startprep.cmd file is not totally necessary, however I find it is best consistency; so the next time you do this you have the command at hand. You could just type the command into a CMD prompt.
startprep.cmd

@echo off
cd c:\windows\system32\sysprep sysprep /oobe /generalize /unattend:c:\windows\system32\sysprep\unattend.xml
Step 15. – Run the startprep.cmd and the system will sysprep revert its specialized settings and drivers and shutdown. Create an image of the workstation using your favorite image software and distribute the image to other workstations. When they restart the unattend.xml file will be run along with sysprep and you will only be prompted for computer name.
example unattend.xml

<?xml version="1.0" encoding="utf-8"?>
<unattend xmlns="urn:schemas-microsoft-com:unattend">
<settings pass="oobeSystem">
<component name="Microsoft-Windows-International-Core" processorArchitecture="amd64" publicKeyToken="31bf3856ad364e35" language="neutral" versionScope="nonSxS" xmlns:wcm="http://schemas.microsoft.com/WMIConfig/2002/State" xmlns:xsi="http://www.w3.org/2001/XMLSchema-instance">
<InputLocale>en-US</InputLocale>
<SystemLocale>en-US</SystemLocale>
<UILanguage>en-US</UILanguage>
<UILanguageFallback>en-US</UILanguageFallback>
<UserLocale>en-US</UserLocale>
</component>
<component name="Microsoft-Windows-Shell-Setup" processorArchitecture="amd64" publicKeyToken="31bf3856ad364e35" language="neutral" versionScope="nonSxS" xmlns:wcm="http://schemas.microsoft.com/WMIConfig/2002/State" xmlns:xsi="http://www.w3.org/2001/XMLSchema-instance">
<OOBE>
<HideEULAPage>true</HideEULAPage>
<NetworkLocation>Work</NetworkLocation>
<ProtectYourPC>1</ProtectYourPC>
</OOBE>
<UserAccounts>
<LocalAccounts>
<LocalAccount wcm:action="add">
<Password>
<Value>cABhAHMAcwB3AG8AcgBkAFAAYQBzAHMAdwBvAHIAZAA=</Value>
<PlainText>false</PlainText>
</Password>
<Description>First Admin User</Description>
<DisplayName>User</DisplayName>
<Group>administrators</Group>
<Name>User</Name>
</LocalAccount>
</LocalAccounts>
</UserAccounts>
<TimeZone>Eastern Standard Time</TimeZone>
</component>
</settings>
<settings pass="specialize">
<component name="Microsoft-Windows-Shell-Setup" processorArchitecture="amd64" publicKeyToken="31bf3856ad364e35" language="neutral" versionScope="nonSxS" xmlns:wcm="http://schemas.microsoft.com/WMIConfig/2002/State" xmlns:xsi="http://www.w3.org/2001/XMLSchema-instance">
<ProductKey>33PXH-7Y6KF-2VJC9-XBBR8-HVTHH</ProductKey>
</component>
</settings>
<cpi:offlineImage cpi:source="wim:h:/sources/install.wim#Windows 7 ENTERPRISE" xmlns:cpi="urn:schemas-microsoft-com:cpi" />
</unattend>
January 20th, 2011 at 10:45 am
You probably should mask your product key.
January 20th, 2011 at 1:15 pm
Mark,
Please use that key… That key is for use with a KMS and this is not documented well with Microsoft. When using a KMS you need to put in a “default key” or it will not activate Windows. So for example… Let’s say you are building an image and you don’t have 25 clients to meet the activation threshold on a KMS server, so you put in a MAK or retail key. If you do not change the key back to the “default KMS key” it will not activate automatically. You might get this error:
0xC004F035
The software Licensing Service reported that the computer could not be activated with a Volume license product key. Volume licensed systems require upgrading from a qualified operating system. Please contact your system administrator or use a different type of key.
or if not enough are active:
0xC004F038
The software Licensing Service reported that the computer could not be activated. The count reported by your Key Management Service (KMS) is insufficient. Please contact your system administrator.
The above error can also be seen if you are using a version of Windows that doesn’t support KMS activation. Window 7 Professional and Windows 7 Enterprise support KMS. The default KMS keys can be found here depending on version: http://technet.microsoft.com/en-us/library/ff793421.aspx
Hope this helps… I can’t stress this point enough, Microsoft is misleading and it isn’t until you have the issue mentioned above you find the answer. Here is the link to the entire activation technet article: http://technet.microsoft.com/en-us/library/ff719787.aspx
Jon
August 30th, 2011 at 8:54 am
Great article, well documented with good working samples.
Appreciate your time putting this up and sharing.
— Savage
October 11th, 2011 at 10:23 am
just put the correct script commands into you sysprep xml file above and kms will work. I can post code to automate contacting the kms server and activating manually or with kms if you like.
October 11th, 2011 at 11:06 am
Jeff,
That would be great!
Thanx in advance
October 11th, 2011 at 12:48 pm
Quick question.
I have created an image for a customer. However she will be installing this image on multiple PCs and each has their own product key. So I was wondering if I leave the “productkey” section blank or use the “write blank” ( I think that’s what it’s called) option, will it prompt her to enter the product key after its been installed?
October 11th, 2011 at 1:18 pm
Aaron,
If you omit the product key, you can always put it in later during activation. When doing that it may make you click thru the product key dialog box. An alternative is if you keep the KMS key in there you can always change it manually later and then activate it. So to be exact: you can switch from KMS back to MAK or retail key. Leaving the KMS key in will just stop you from getting a dialog box during install.
October 11th, 2011 at 1:58 pm
I just tried to create the answer file with the “write in blank” and saved it. Tried to run sysprep using the answer file and it gave me an error.
The thing is the system we are working off of she already entered the key and activated it. Which is fine but when she goes and installs it on a new PCs, we would like her to use the keys on the side of the new PCs. Not the one that was used in the image.
So we need to create an answer file or something that will erase the key so she will be prompted to enter it when she installs the image on the other PC’s.
I tried running the slmgr command with the rearm and the upk command to erase the key and rearm the image. Which it did, but when I ran sysprep and rebooted the machine, it came back activated and with the key installed :S.
October 11th, 2011 at 2:11 pm
If it gave you an error running sysprep or during the sysprep then it is the sysprep process meaning you should check the batch file that launches it, or there may be another problem. I would check eventviewer or log files. What you are looking to do we do all the time: basically from a retail or OEM activated machine creating a syspreped image that you will activate later.
If you are editing the file via a text editor you could create a problem during sysprep. The Window SIM will give you cautions if you try to do something that might fail. Leaving the entry in and blanking the line out would possibly do that. I recommend you leave the KMS key in and activate it later with the retail/OEM key.
October 20th, 2011 at 4:37 am
Yay, finally a blog with an easy to follow guide. TY. 🙂
December 27th, 2011 at 12:42 pm
Is it possible to have this auto join a computer(s) to a domain during setup? If so, which option/property do I need to modify?
I tried adding a configuration file in Symantec Ghost to do this but it seemed to just ignore the configuration file, but installed the image flawlessly.
Thank you in advance.
December 27th, 2011 at 9:55 pm
Unfortunately you can’t join the domain during sysprep… Well documented problem, but I haven’t tried the latest WAIK; to see if it’s been fixed. The way I do it is with the netdom command. A little Googling and you’ll find several soutions.
February 15th, 2012 at 7:57 pm
Chris,
MySysprep2 works well at adding the system to the domain during sysprep, but it is not unattended. It will prompt for Username, Password (In the clear), and computername. There is one for x64 also.
February 15th, 2012 at 9:08 pm
Thanx for the link… I’ve seen that once before, but was skeptical on if it was going to be maintained in the future on service packs as sysprep changed. It looks like it is current with 2008R2 so it is actively maintained, but you’re right it’s not automated.
February 28th, 2012 at 8:26 am
I am trying to join the domain as well but I need to run a scriptit script to name the PC according to company naming conventions. I use wmic and it forces me to reboot before it pulls the new name. Will your sysprep2 use the currently changes name or would it require a reboot as well?
April 13th, 2012 at 4:14 am
Thanks for the guide, I have done exactly as you did but I have some issues, only the last prompts are manage by the unattend.xml. Language, EULAPage appears and disc options is prompting, also the licens key is not entered and activated by it self. Any ideas?
May 21st, 2012 at 9:06 am
Bohack thank this helped me create my first ever sysprep xml file. Good news is it work to except I was not using a KMS server and I ended up using Mysysprep.exe to allow for pc naming before auto joining the domain. Also to allow a popup box to enter the admin password to be entered since admin password per computer is unique. I also added a scripts folder in %windir%\setup\ in the scripts folder was a .CMD file with the commands del /Q /F c:\windows\system32\sysprep\unattend.xml and del /Q /F c:\windows panther\unattend.xml
these two commands were added to delete all instances of the xml file from the pc after sysprepping.
May 21st, 2012 at 10:09 pm
Glad it helped… There is a lot missing from sysprep that I hope the next release fixes… Mainly joining domains, after a rename and allowing for prompts.
June 4th, 2012 at 1:34 pm
Yes it is missing those things. Sysprep I discovered if auto join domain it joins before naming the pc. Also like you said no prompts such as for admin password. I solved these issues by using mysysprep in order to name pc before auto joining domain, allowing for admin password to be entered, and even if wanted allow for selection of multiple domains from a dropdown menu.
August 29th, 2012 at 6:27 pm
According to this page on Technet, you do not need to input the KMS key separately if you run sysprep on an install from Volume License media. (http://technet.microsoft.com/en-us/library/ff793406.aspx) Have you tested this without inputting the KMS key in the Unattend.xml file?
The information in this section is for Volume Licensing customers using the Windows Automated Installation Kit (Windows AIK) to deploy and activate a Windows operating system. Prepare KMS clients for deployment by using the System Preparation Tool (Sysprep) or the Slmgr.vbs script:
Sysprep. Before capturing an image, run Sysprep with the /generalize command-line option to reset the activation timer, security identifier (SID), and other important settings. Resetting the activation timer prevents the image’s grace period from expiring before the image is deployed. Running Sysprep.exe does not remove the installed product key, and administrators are not prompted for a new key during mini-setup. If no rearms are left, the Sysprep operation completes but the activation timers are not changed and an error is returned that explains the situation.
August 29th, 2012 at 7:13 pm
My experience in the past has been if you do not put a KMS key, then when you try to use the KMS server it fails because it defaults to look for a retail key. However this was on 2008 and not 2008R2 so something might have changed with this release. It will not hurt putting the KMS dummy key into the XML. The slmgr.vbs is used to manually enter the KMS server or KMS dummy key. If you put the KMS dummy key in the unattend.xml, then the server will find the DNS entry for the KMS and automatically activate no manual intervention.
December 11th, 2012 at 3:30 pm
I can’t tell you how frustrated I am with this sysprep process and cloning. I keep encountering the same exact problem.
Here are the steps I am following.
#1 – New Machine out of the box (In this case Dell Optiplex 790)
#2 – Load Windows 7 (32 Bit) Professional
#3 – Enter Audit Mode: CTRL+SHIFT+F3
#4 – Install all Applications, etc
At this point, I have my “Perfect” machine ready to be cloned.
#5 – Create Answer file (Followed instructions here to the letter – Multiple times in fact) Including the startprep file and moving the unattend file.xml into the sysprep directory.
#6 – Launch the StartPrep file which sends the machine into Sysyprep and shuts it down.
Now at this point, the machine is done and should be in “Out of the Box Mode”. I then clone the hard drive using a hardware disk duplicator we have on site. This should create multiple drives ready to be deployed into machines. I expected the machines using these cloned/sysprep drives to boot into out of the box mode.
However, when I boot up, I am asked all the questions I expected to be answered in the file. This includes creating an account, naming the PC, setting the time zone etc.
I do not understand what I am doing wrong. Anyone have some thoughts?
December 11th, 2012 at 9:12 pm
Mike,
I feel your pain… In 2008 I had sysprep just asking for the username and that was it. In 2008R2 and Windows 7 SP1 something changed. I tried sysprep-ing over and over again, it never worked right. My recommendation is to write a script to rename and join the computer. One of my techs wrote the script, so I will find it tomorrow and post it. I also recommend using vmware workstation to test the sysprep and joining script. It’s way easier to snapshot back then to pull another piece of hardware out of the box.
Jon
December 19th, 2012 at 11:12 am
I just wanted to post a followup and explain how I resolved my previous post.
This was a silly mistake and I wanted to make sure no one else makes it.
I was able to get this working perfectly with a x64 bit sysprep/image.
When i went back to x32 it failed. I fianlly realized why! I never changed the source files (Windows Image Left Side of AIK) to point to a 32 bit install.wim
Rookie mistake..